This week TargitFit is pleased to bring you an informative article on tanning, by Maria Jose Meneses:
Summer means it’s time to get out your swimsuit and show off your beautiful bronze tanned skin. If you’re not ready to hit the beach just yet, there’s no need to fret. Thankfully, getting ready for summer is easy, and you can get a gorgeous glowing tan at home so you can step out in confidence. Whether you choose to self-tan using a sunless tanner or prefer to go natural with sunlight, there are a few essential things to keep in mind before you start the self-tanning process. Check out this guide that includes tips and advice to ensure that you get the perfect self-tan at home.
Sunless Tanning
How to set up your space
Using a sunless tanning product is an easy way to get a rich tan at home. Before you start applying your favorite product, it’s vital to set up your space so that it’s ready for your tanning DIY session.
-Choose the best places in your home that are easy to clean and where the sunless tanner won’t stain fabrics or carpets. A room without much furniture is ideal since you won’t need to worry about getting the product on the couch or your favorite chair.
–When applying self-tanning products, it’s always best to do so inside. If you apply it outdoors, you might end up sweating afterward, which causes the tanning solution to run and streak.
-Ideally, apply your self-tanner in a cool or cold place with plenty of air conditioning. Don’t forget to have plenty of old towels around so you can wipe off messes and keep your hands and the items around you clean.
Types of Self-Tanners
You can purchase self-tanners in a variety of formulas, depending on your needs and preferences, including:
Self-tanning mousse. This self-tanner comes in a canister and delivers a nice foam-like consistency. Self-tanning mousse is thicker and darker than lotion, and it’s best to apply it using a mitt so you get even coverage. Mousse tends to give you more coverage with less streaking than some other formulas.
Self-tanning lotion. Self-tanning lotion typically develops within six to eight hours of application. While this is a popular choice for many people, it’s best to use lotion only if you have experience applying it since there is very little room for mistakes. If you apply a tanning lotion to an area by accident, it’s difficult to fix the error since most lotions are potent and deliver a powerful punch of color to your skin upon contact.
Self-tanning mist. Think of self-tanning mist as a convenient tan in a can. This formula is super easy to apply, and it also helps you tan those hard-to-reach areas, such as your back or the back of your upper thighs. Use a mist in even strokes, and apply it using a circular motion to get an even application.
Self-tanning serum. A self-tanner serum is typically to tan your facial skin. This product is an excellent way to get an even tan that matches the rest of your body, and you can apply it gradually until you reach your desired level of darkness. Most self-tanning serums include other ingredients to moisturize and hydrate your skin, too.
Self-tanning oil. If you prefer oil to serum, self-tanning oil is an excellent choice to give your face and neck a healthy glow. Look for a self-tanning oil that works overnight so you can incorporate it into your beauty routine before bedtime.
Steps for tanning at home
Once you set up your space and you’ve chosen your self-tanning products, it’s time to get started.
Get ready the day before. The day before you apply self-tanner, get your skin prepared by shaving or waxing excess hair. Ensure that you have a smooth surface to apply the tanner to, or else it might not absorb evenly into your skin.
Exfoliate. Before you apply a self-tanner, exfoliate your skin from head to toe with an oil-free exfoliator. This step is crucial since it will keep your tan from looking uneven or splotchy.
Moisturize. Apply a lightweight, oil-free moisturizer or lotion to just the dry spots of your skin. This includes areas like the knees and elbows so that your skin is smooth and ready to absorb the self-tanning product. Dry areas tend to absorb more product, making them look darker if they’re not prepared beforehand.
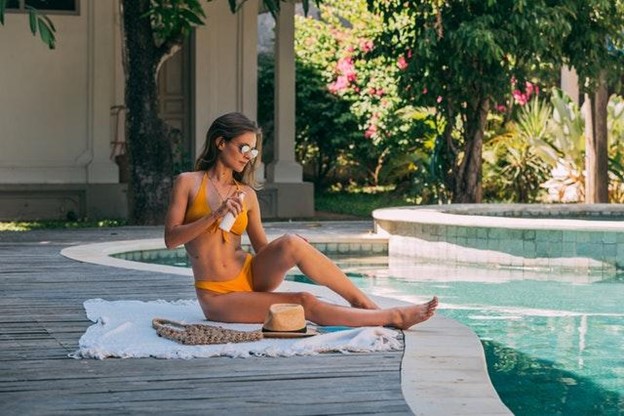
Apply your self-tanner of choice. After you’ve prepped your skin, you can apply your self-tanning product of choice using a mitt or applicator sponge. Avoid applying the product with your hands to prevent staining of your fingers and underneath your fingernails.
Face first. Begin your sunless tanning by applying the product to your face first. This will give you a good idea of just how dark or light the rest of your tan should look when you’re ready to apply it to the rest of your body.
Start at the bottom. After you tan your face, begin applying the product starting at your feet and ankles, and work your way up from there. Use slow, even motions and apply just enough product to absorb into the skin. You can always go back over areas that look too light or that need some touching up.
Pro tips
Here are some pro tips about tanning with a self-tanner at home.
Wear gloves. Always wear gloves or a mitt when applying self-tanner, so it doesn’t stain your fingernails or the palm of your hand.
Clean up mistakes. Wipe off excess tanner as you go and clean up mistakes as soon as you notice them before the product starts to change color in areas where you didn’t plan to apply it.
Wait before getting wet. Give your self-tanner time to work and avoid getting wet after applying it until everything is completely dry and fully absorbed. Avoid taking a shower for at least a few hours, so the tanner has time to do its job.
Don’t sweat. When you apply self-tanner, make sure you do so in a cool place where you won’t sweat, which can cause severe streaks and unevenness.
Avoid deodorants and antiperspirants. Don’t apply deodorant before you self-tan, or it can create a barrier that will make your underarms look white or may turn them an odd green color. Feel free to apply deodorant later after you’ve showered and the self-tanner is fully absorbed.
Don’t apply a second coat. Applying the second coat of self-tanner can make your skin look too dark or unnatural. As long as you apply the first coat in sections and go slowly, you should end up with a beautiful, even tan.
Afterward, wear dark loose clothing. After you apply self-tanner, make sure you wear loose clothing that won’t cling to your skin to keep the product from streaking. Wear dark clothing that won’t leave a permanent stain behind.
Sun Tanning

How to set up your space
Before you start soaking up the sun, it’s essential to set up your new sun tanning space.
Choose a place at home where you’ll get plenty of sun and privacy. A balcony, garden, or terrace are all good locations.
Try not to suntan under a patio umbrella or a tree, or else your suntan will end up looking uneven.
Place a comfortable lounge chair or outdoor sofa in your tanning area so that you can lie down comfortably. A large beach towel laid on the ground or a balcony is another good option.
Steps for sun tanning at home
Follow these easy steps to make sure that your natural suntan turns out beautifully.
Exfoliate. Apply a high-quality exfoliator to your body to remove dead skin cells and give you a smooth surface to start from. This will also help to reduce or eliminate excess flaking once your tan develops.
Put on a small bathing suit. When it comes to getting a tan, the smaller the bathing suit, the better. Wear something that exposes enough skin so that you’re getting a complete tan over as much of your body as possible.
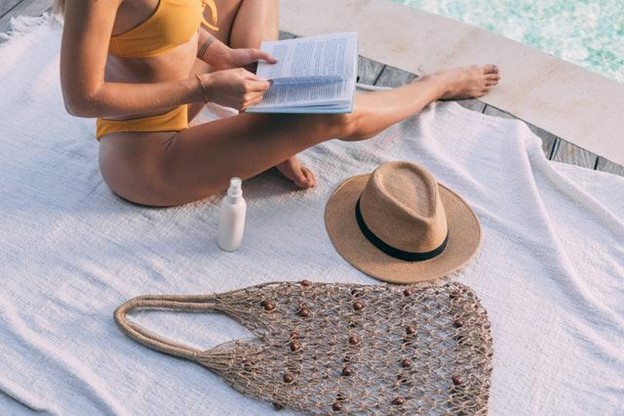
Get your essentials. Remember to gather a few essentials together before you start tanning, like a large bottle of ice water, entertainment like music or a movie on your tablet, and a comfortable chair or towel.
Apply a high SPF tanning oil. Although your goal is to get bronze, it’s still important to apply a high SPF tanning oil, preferably one that is 30 SPF or higher.

Pick the right time of day. The best time of day to get a fast tan is between the hours of noon and 3 p.m. when the sun is the strongest. This is also the time of day when the sun can do the most damage, so keep this in mind and never forget to apply some form of sun protection. Those with fair skin should tan in the morning or after 3 p.m. to help reduce the risk of sunburn.
Reapply tanning oil hourly. Don’t forget to reapply your SPF tanning oil every hour to protect your skin from the sun’s UVA and UVB rays.
Pro tips
Keep these pro tips in mind if you decide to get a “natural” suntan at home.
Repeat regularly. To get the best, deepest glow, you’ll need to repeat your sun tanning sessions regularly. Try to do so every other day just to give your skin a break.
Stay hydrated. Sitting in the sun for prolonged periods can cause dehydration. Always make sure that you’re drinking plenty of water whenever you’re outside tanning or any time you’re in the sun.
Eat foods with beta carotene. Beta carotene is a natural plant pigment that gives food like carrots and other vegetables their bright coloring. Eat foods that are high in beta carotene to speed up the tanning process and to help you get a beautiful tan without burning.
Wear a strapless or a swim brief for better results. Wear a strapless bathing suit or swim trunks without a shirt to prevent lines from showing once your tanning session is complete.
Don’t fall asleep! Make sure you stay awake the entire time you’re outside tanning, or else you could end up with a serious sunburn. If you start to feel sleepy and can’t stay awake, go indoors and try again another time.
Keep these simple tips in mind to help you get ready for summer. From applying a self-tanning product to sunbathing in your backyard, it’s easy to get a perfect bronze tan with the right tools and some patience. By the time your self-tanning DIY sessions are complete, you’ll be ready to hit the beach and show off your new gorgeous glow.
This article originally appeared on Porch.com
Maria Jose is a Marketing Specialist and does Content Marketing at Porch. She is passionate about animals and her hobbies are reading, writing, traveling and music.